If you're among the millions looking for a way to enjoy a flawless tan throughout the year, chances are you've scoured the net and your friends list for the best products and methods to make that dream a reality. Seasonal changes mean less time spent on the beach or in the backyard, and for those looking for a safer alternative to excessive sun exposure–the self-tan process can feel a bit daunting! There are so many self-tanning products to choose from, and they all sound amazing!
Thankfully, there are ways you can achieve a natural bronze glow all year long without having to break the bank or bring on early signs of skin damage. In this blog, we'll highlight some tips you can use to enjoy your best-ever fake tan, no matter the season! Along the way, we'll highlight our picks for the best self-tanning products to give your skin that sun-kissed, summertime glow. Let's do this!
Invest in the Right Self-tanner
Right off the bat, the path toward a phenomenal fake tan starts with investing in the right self-tanner. After all, if there's one Golden Rule when it comes to skincare, it's quality > quantity every time, no exceptions. Your skin is no fashion accessory, and while others might see their skin as a more cosmetic piece of their appearance, similar to their hair, it's important to remember that your skin is a living organ. Like your liver or kidneys, it's affected by everything you put into or onto your body. You want to treat it well, and that includes choosing high-quality skincare products whenever possible.

That being said, a quick Google search of "the best self-tanners" is going to return a lot of competing results. It's easy to get overwhelmed, and it's just as easy to rationalize spending your skincare budget on a ton of cheaper products to stretch every dollar. Resist that urge! Instead, aim to stock up on high-quality products you can trust. Not only will these products have better research and testing behind them, but they'll be better formulated, more effective, and most importantly, much safer for you and your skin.
Pick Your Preferred Self-Tanning Method
In your search for the perfect fake tan, there's a good chance you'll also come to a crossroads when it's time to choose how you want to go about getting that new glow. Let's dive into a few of the more popular methods.
Spray Tan
As one of the first options for self-tanning, most people stumble upon spray tanning as a quick way to skip sunbathing in their teens, often with varying (sometimes horrific, very orange) results. While a good spray tan can certainly be worth the investment, it comes with its own set of pros and cons.
On one hand, you're trading harmful UV radiation for a tan you can apply quickly, often on a tight schedule. After all, there's no denying the perks of being able to book an appointment just in time for family photos, a vacation, or a big event. On the other hand, spray tans don't always have the most even application, leading to stained clothes, sheets, or floors if done incorrectly. No, thank you!
There's also the issue of spray tan longevity, wherein you're getting a quick, convenient tan, but that convenience comes with a caveat: it doesn't last as long. To add to that, the chemicals used in spray tans can sometimes cause allergic reactions, making it necessary to do your research if you're someone who struggles with sensitive skin. It's a lot to consider, so it's no surprise that most self-tan aficionados weigh their options before jumping in front of the nozzle.
Tanning Drops

For those wishing to skip the spray tan experience entirely, tanning drops offer an effective (and much less messy) way to get that perfect golden glow, without the risk of harsh chemicals or harmful UV exposure. Made in a clear formula and infused with a host of skin-healthy ingredients like hyaluronic acid, antioxidants, and Vitamin E, the best tanning drops work to illuminate and even your skin tone almost immediately. This makes them an extremely attractive option for those wanting a more subtle, natural-looking glow. By combining them with your favorite moisturizer, foundation, or body lotion, you can even apply tanning drops to your face, making them even more versatile! In fact, many people forgo foundation in favor of tanning drops!
Best of all, you won't have to worry about dreadful smells, as premium tanning drops ditch the strong scents of traditional spray tans in favor of lighter, more pleasant floral scents. If that weren't enough, tanning drops offer the option to customize your tan level. A few drops will give you all the subtle glow you need, while a few extra drops will open up opportunities for darker, deeper tans. It's a win-win, especially when you consider that the best tanning drops won't clog your pores.
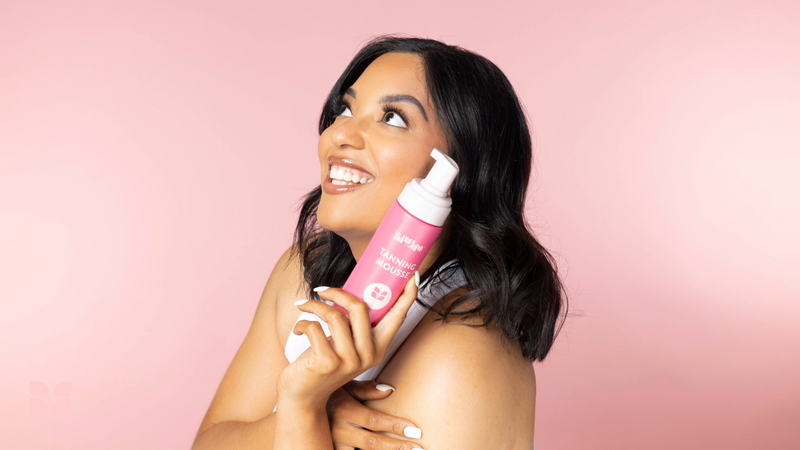
Tanning Mousse
In the world of sunless tanners, one of the easiest and most affordable options for a natural bronze glow is a high-quality tanning mousse. Whether you have a darker complexion or were born with fair skin, this particular type of tanning is attractive for several reasons.

For starters, tanning mousse provides instant illumination, thanks in large part to its ingredients being so similar to the tanning drops we highlighted above. The best tanning mousse formulas provide a healthy boost of Vitamin E, which is ideal for helping to even out skin tone, prevent hyperpigmentation, and blur imperfections. This is made even easier by the fact that tanning mousse formulas like Red Aspen’s have an advanced color guide built right into the formula, providing an instant bit of color and an easy way to track where you’ve already applied the product.
If that weren’t enough, self-tanning mousse can be a great way to add rich moisture to particularly dry areas like the ankles, knees, elbows, and hands. While there's a definite process for applying tanning mousse that you shouldn't deviate from, the best news is that you won't have to wait long to see results, as a fully developed, high-intensity tan can be seen in as little as 4-8 hours.
Pay Attention to the Ingredients
At this point, you might be thinking to yourself "OK, so I've looked at all of the options. How do I know which sunless tanning products are right for me?" The answer is simple! Pay close attention to the ingredients. More specifically, keep an eye out for a few key ingredients that nourish your skin while giving it that radiant, sun-kissed glow you're looking for!
For instance, a tanning drops or tanning mousse formula with hyaluronic acid is a great way to keep your skin looking plump and hydrated, ultimately helping you to maintain that rejuvenated, youthful glow and appearance. In the same vein, you'll want to look for sunless tanners infused with Vitamin E, as it's often the secret to smoother skin and more even coverage. This is one area where Red Aspen tanning mousse really shines, as its nutrient-rich formula includes VItamin E as a primary ingredient, along with other skin-yummy ingredients like rose essential oil to deeply nourish your skin and leave it feeling kissed with a light floral scent.
All in all, your goal is to take special care of your skin while simultaneously giving yourself the glow you deserve. When you take time to closely study the ingredients of the products you're using, this process becomes a lot easier.
Exfoliate Before Doing Anything
Speaking of processes, one of the worst mistakes you can make with self-tanning is failing to do the proper prep work. Like most skincare routines, there's a tried and true method for great results, and skipping steps can lead to some pretty embarrassing "Oopsies." No one likes a patchy, streaky mess of a tan, and you certainly don't deserve it!
With that said, your first step towards achieving an awesome fake tan should be to exfoliate your skin as much as possible. Jump into a hot shower, shave those legs, and completely wash and dry your skin. If you don't already use one, now is also the perfect time to try out an exfoliating mitt. Not only are they super handy to have in the shower, but the microfibers are gentle, making it a lot easier to buff away the last bits of dry skin and fully prep your body for tanning drops, tanning mousse, or whatever self-tanning product you decided to go with!

More importantly, try to start the exfoliation process at least 4-6 hours before applying any self-tanners. Your goal is to create a nice, smooth base for the product to glide onto. Trying to apply self-tanner to skin that isn't shaved or exfoliated can cause issues quickly, as the tanner can stick or cling to dead skin cells for less-than-desirable results. On top of that, you need to give the little hair follicles on your legs time to close to avoid the risk of irritation. By starting the exfoliation process the right way, you have a much better chance of achieving a natural-looking tan worth preening over!
Keep Common Dry Spots Moisturized
The next step in a flawless fake tan is to keep those common dry spots on your body (i.e. your hands, elbows, ankles, and feet) as moisturized as possible. Not only is this much healthier for your skin overall, but these areas tend to soak up more product than other parts of your body. Try and skip straight to slathering on the self-tanner, and you end up with orange palms and feet. Yikes!
Now remember, your goal isn't to go overboard on the body moisturizer. You don't want to risk diluting the color later on. Instead, reach for a quality hand cream or body cream and apply them as evenly as possible. Likewise, try to apply your preferred moisturizer every day of the week leading up to the day you apply the self-tanner. This will ensure the most even coverage and the best, most-radiant results.

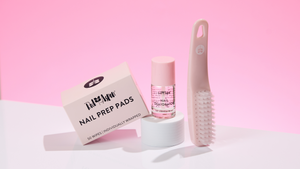
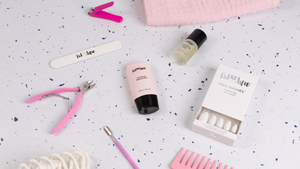
Stock Up on Self-Tanning Accessories
As exciting as it is to apply an amazing fake tan, it's a lot better knowing that you have everything you need to make sure it lasts as long as you need it to. For this reason, take time to stock up on all the self-tanning accessories you'll need to get the ball rolling. Here are a few key items you might want to consider.
Tanning Mitt

If you opt to start your self-tan journey with the tanning mousse, you'll want to focus on grabbing a tanning mitt to go with it. Not only is the tanning mitt important for helping the mousse to go on smoothly, but its soft, velvety texture ensures the end result is streak-free, all while protecting your fingers from unwanted stains.
There's a process here too, and for the best results, you'll want to stand in front of a mirror and add one to two pumps of tanning mousse into the tanning mitt. From there, use circular motions to apply the product to clean and exfoliated skin. Best of all, you won't have to worry about whether or not you're getting all the right spots. Thanks to the advanced color guide built into the formula, you'll have a clear visual from start to finish! It's that easy! Just remember to rinse your tanning mitt with warm water and let it air dry after using it. You want to keep things nice and tidy for whenever you decide to apply more tanning product later!
Tanning Back Applicator

Tanning your back is also no joke, and anyone who's ever gotten a fake tan knows how difficult it can be to get those trickier spots. You can only reach so far! Thankfully, there are tools to help make the task of applying body self-tanner to your back a lot less awkward.
With Red Aspen's Tanning Back Applicator, you'll no longer need to worry about stretching and contorting to weird angles to get every bit of your back covered in self-tanner. The gentle fabric will wrap comfortably around your back, and the easy-grip handles make it so you never have to worry about embarrassing tan lines again! That being said, be sure to wear loose clothing and avoid exercising, sweating, or getting your skin wet for a few hours afterwards. This will ensure the best possible coverage. Just as with the tanning mitt applicator, be sure you rinse the back applicator with warm water after you’re finished. Clean tools provide clean results!
Kabuki Brush

OK, so we've covered tanning most of your body, but what about those trickier, more absorbent areas like the ears, hands, and feet? Blending tanners into those spots requires a bit of extra care, so to make sure your bronze looks as natural as possible, be sure to get your hands on a kabuki brush from Red Aspen.
Like your favorite makeup brush, a kabuki brush has a shorter handle for easier control. On top of that, the bristles are short, soft, and tightly packed together, making it the perfect tool to blend body self-tanners more fully!
Find the Right Self-tanner for Your Face
Last but certainly not least, everyone who gets a fake tan wonders how they can go about getting the face looking as neat and natural as possible. It's going to be your most displayed feature, and you deserve a streak-free tan on your moneymaker! While it might be tempting to get nervous here, don't be! Seriously! You don't have to be a wizard or celebrity tanning artist to enjoy an effortless, golden glow.

That being said, applying self-tanners to your face does require some extra care. The kabuki brush comes in handy here, but a tanning mini mitt is going to be your best bet. Made with the same materials as a standard tanning mitt, its smaller size is ideal for gently applying tanning mousse to all angles of your face. If you've opted for the tanning drops this time around, it's still a good idea to add the tanning mini mitt to your makeup kit whenever possible. After all, you never know when you might want to switch things up!
Step Into Your Best-ever Self-Tan with Red Aspen Beauty Products!
So, there you have it! Seven surefire tips to help you get a flawless, streak-free fake tan every time! Whether you're new to self-tanning or you're pretty sure you've got the process down, it never hurts to give your skincare routine a little boost in the process!
With a wide range of iconic beauty products for all skin types and skin tones, Red Aspen is passionate about helping everyday women like you enjoy the healthiest, most radiant skin of their lives. Reach out to a Red Aspen Brand Ambassador today to learn how you can step into your best-ever self-tan with Red Aspen!
Written by: Kerry Cron
Done reading? Return to home.